What is Disk Partition?
Partition, namely, an independent part of hard drive, in general, it has two partitions in one disk, one with installing operating system, another is used to store data or files of users. In such circumstance, if one partition has something wrong, the other will not be affected. If you need, you also could create more partitions to store your data and files with classification. Commonly, you must partition a hard disk to store data when you purchased a new hard drive.Why Partition a Hard Drive?
This part will give you some reasons:- Make partitions independent. Other partitions will not be broken with one partition destroyed. At the same time, make your data and file group easily.
- Encrypt to protect data safety. Put all your cryptographic data to one partition, you just need to encrypt this partition rather than all partitions, to do so could not decrease the efficiency to visit other partitions. What' more, you can't encrypt system partition for the normal operation of your OS.
- Store similar program or games program to one partition, and label them a name to distinguish from other kinds. For an office worker, for storing her files with classification, this is even more important to create more partitions. They will make her working more fluently and easily.
- When you wish to install dual or multiple boot, such as windows XP and windows 7, how could achieve it? Well, it is essential to create partitions.
How to Partition a Hard Drive?
The most of common operation to partition a hard drive includes create, delete, format, and adjust partition size. To attain these objectives, here will be introduced a free software--- partition Assistant. And here it comes the functions illustrated respectively.Create Partition on a Hard Drive
Create operation is so easy; you have two choices, the first one, use built-in disk management, the second, by Partition Assistant. If your disk space was all allocated, Partition Assistant is the only solution to solve your difficulties.1. Create Partition in Windows 7
Note that the operations on windows of Microsoft nearly the same as the operation on Windows 7. Firstly: click right "My computer" on window, select "Manage" to open another window, find "storage" on the left, and find and click "Disk management" on its Subdirectory.
Secondly, select "New Simple Volume" on the disk with unallocated space you wish to create partition; here runs a New Partition Wizard to guard you achieve the work step by step. Refer to the following view:

The following articles will help you create drive quickly with Partition Assistant. First of all, start up it; right click on the unallocated space, to be here:
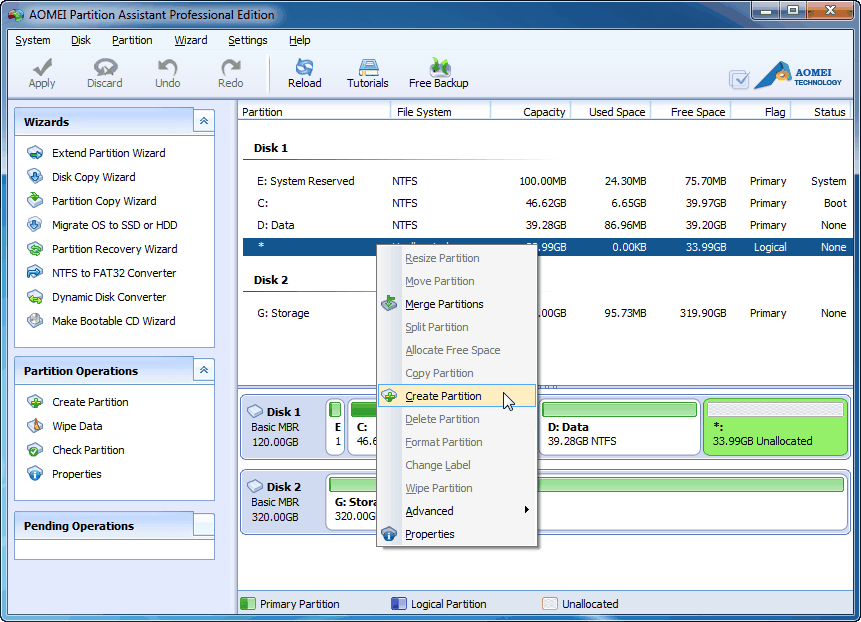
In the above view, select "Create" on the pop-up menu, it will open another interface and you could specify some parameters or keep default configuration as follows:
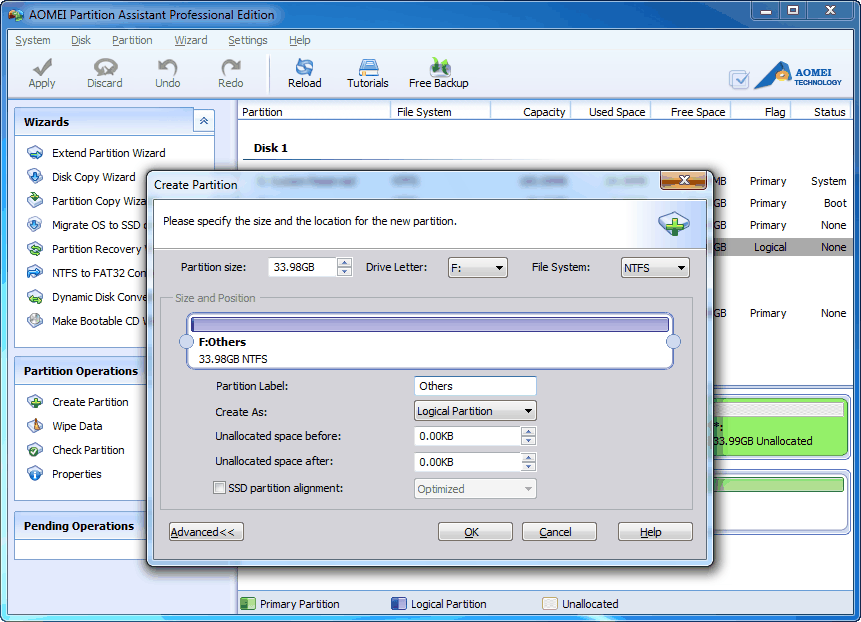
After finished, click "OK" and come back to the main window of Partition Assistant. Here you must click "Apply" to make your operation run. Later, visit the new drive in "My computer".
Delete Partition on a Hard Drive
For some unwanted partition, delete it to save your space for other use. Disk management just supports you to delete it without wiping data, if you need to wipe data permanently and anti-data recovery, don't hesitate, and try with Partition Assistant.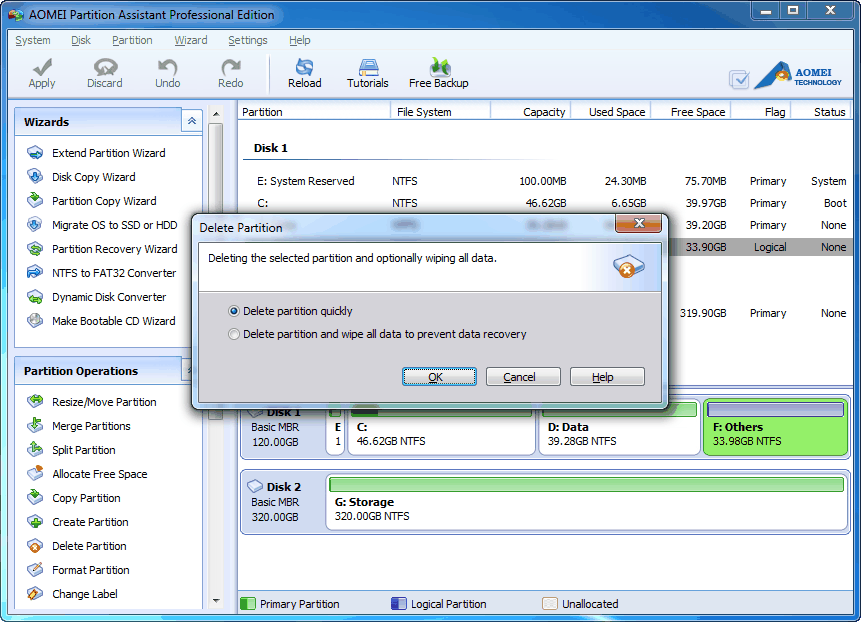
Look at the above view, it shows how to delete F: drive. Right click on it and select "Delete", then read the pop-up interface, it gives you two choices, here select "Delete partition and wipe all data" in order to wipe your data permanently.
Note that due to the normal running of system, system boot partition can't be deleted, unless use the "Clear Disk" of Partition Assistant.
Format Partition Operation
When it is needed to change file system (such as convert NTFS and FAT32 with each other) or wipe data fast, format them. Take a careful consideration before starting your formatting, since all the data could be cleared. Open your computer and select a drive, right click "Format". In the following view, mainly take D: drive for instance. Of course, it is a piece of cake for Partition Assistant.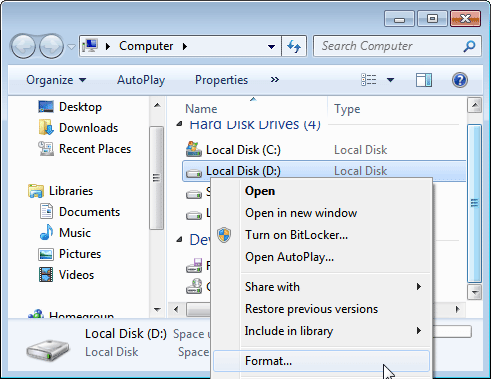
Resize Partition for Hard Drive
Resize Partition also namely repartition or adjust partition size. We postulate that it has two partitions on a disk, C: with 20GB, and D: with 60GB. With partition Assistant, extend C: drive to 30GB, shrink D: to 40GB without losing data. Sometimes, we have not any choice but using the third party software as the fact that the systems before Windows Vista have no built-in disk management utility to resize operation, such as XP, 2000, 2003, in addition, though Vista, Windows 7 and Server 2008 have some update on these aspects, it is limited and imperfect.If you don't know how the Partition Assistant to finish the works does, read the following demo to resize C: from 16GB to 25GB, and reduce D: from 18GB to 9GB. To begin with, show you the current disk condition below:
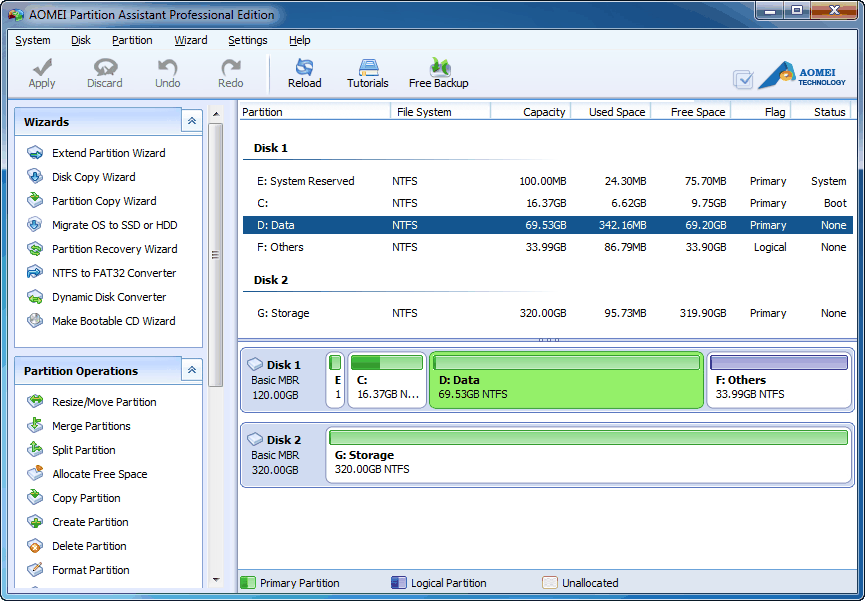
Step 1: right click D: partition and select "Resize" menu, shrink it to 9GB as the arrow shows in the pop-up interface, meantime, move D: to the right to make the unallocated space stay behind the C:.

Then, click "OK" on the below view, you will get the following operation condition:
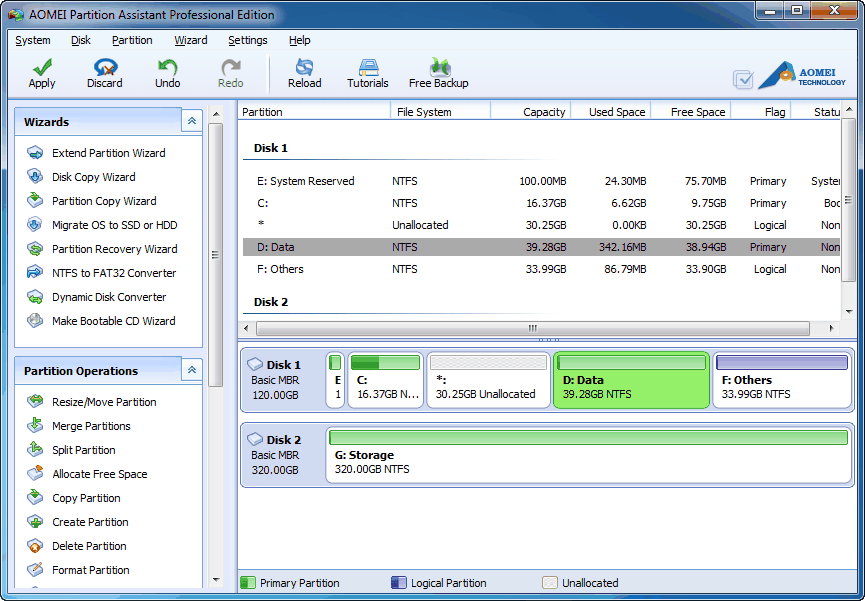
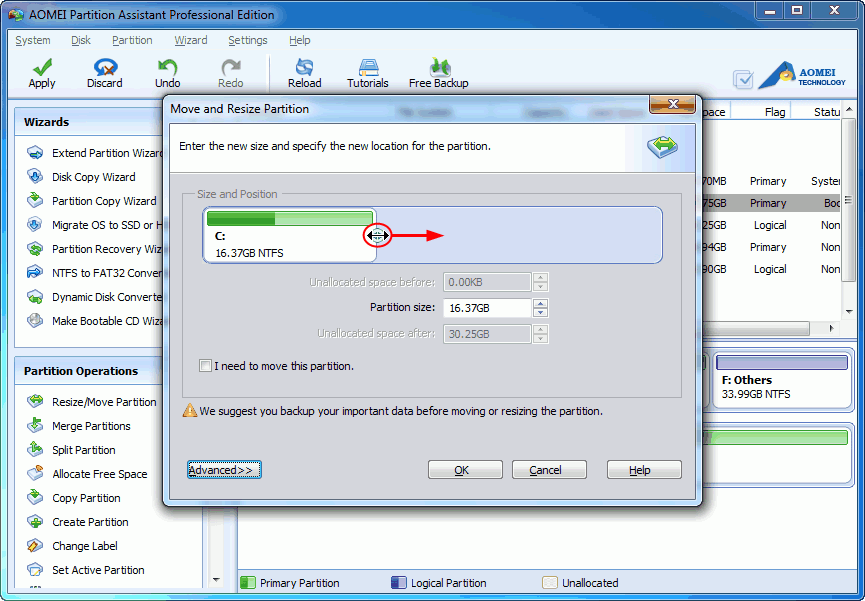
Step 2: Expand C: Partition to allocate the unallocated space (9GB). Click the C:, drag double-headed arrow to the right:
Step 3: Finished resizing, get the following layout, click "Apply" in toolbar to operate all procedures.
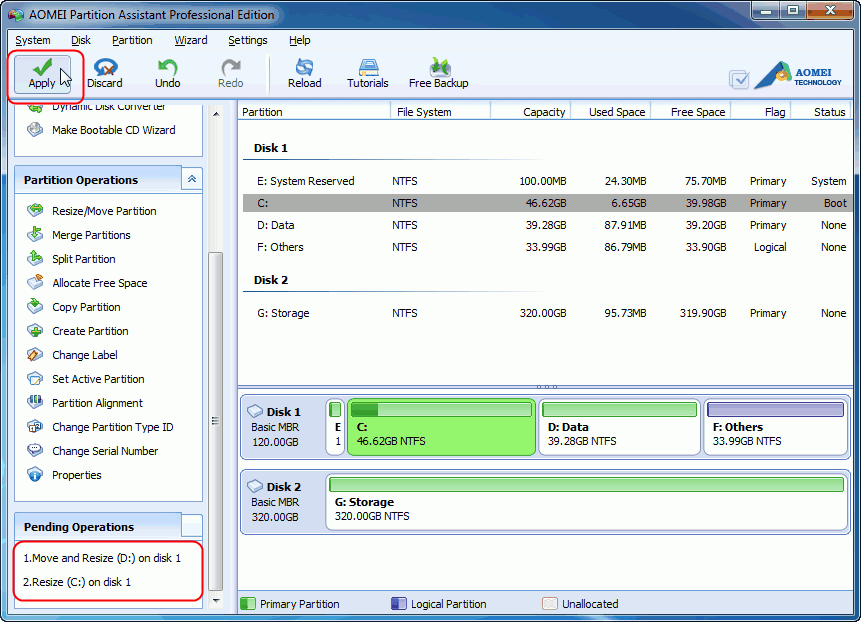
Just by simple procedures, get what you want!
Nice and very helpful information i have got from your post. Even your whole blog is full of interesting information which is the great sign of a great blogger.
ReplyDeleteAcer - 15.6" Aspire Notebook - 6 GB Memory - 500 GB Hard Drive (E1-571-53236)
Acer - Aspire 15.6" Laptop - 4GB Memory - 750GB Hard Drive - Glossy Black (NX.M12AA.029)